Installing our standard size motorized shades is a relatively simple process. Any handy person will be able to accomplish this quite easily. We have customers with little to no experience with installations who report back to us that this was a very easy thing to do, and we look forward to hearing back from you about your experience too.
1. Parts You Will Use:
-RollerTrol Motors (powered by rechargeable battery or wired power supply on AC grid)
-Shades, Mounted on standard Rollease type tubing
-Tube End Cap Idlers (these allow your motor to do it's job while holding the tubing in place)
-Mounting Brackets (all you need is 4 screws and a screwdriver!)
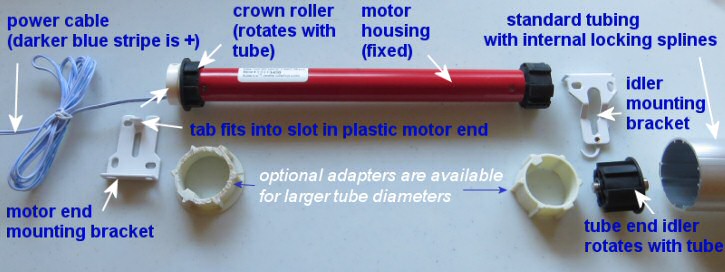
Our standard size Rechargeable Battery and Wired Motors simply slide into either end of the shade tubing and lock into position using the grooves inside of it. Our motors are programmable in reverse, so you can pick which side of the tubing works best for you
On the opposite end of the shades, the tube end cap idler is used to let the tube turn when the motor is in use. This allows your shade to raise and lower while mounted to the wall (see pictures in sections 2 and 3 below). This is a picture of our older R series motors, but the newer P series and G series motors are mounted in a very similar way:

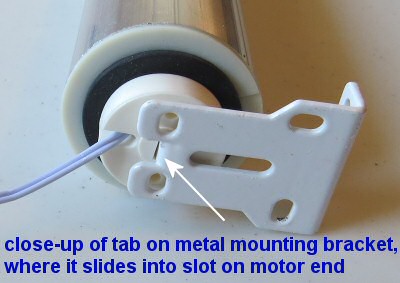
2. End of the tube detailing the slot where you insert tab in the motor:

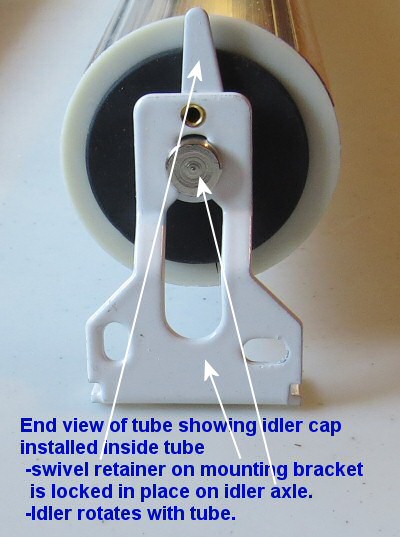
3. End of the tube detailing the tube end cap idler in correct position on mounting bracket:

And voila! There you have it, you've successfully installed your very own RollerTrol Automated Shade! Now you can invite the neighbors over to show your state of the art window fashions, and how easy they are to install.


